

A friend of mine
often relates his experiences of meeting the modern breed of cyclist
who normally greet him with “What are you riding that oul thing
for?”, referring to his custom built Mercian bike. He then explains
the difficulty in trying to get the modern 'expert' to understand
that his bicycle was custom built, i.e. made to measure for him. The
usual response is “Mine is custom built”, the tyro meaning, he
got what bits he wanted, hung on his small, medium, or large size,
carbon frame. Ask the tyro about frame angles, chainstay length,
fork rake and bottom bracket height and he is lost. Does not compute
at all, as rarely if ever covered in the UK cycling press, and
besides it's all about the decals on the frame, x is better than y,
irrespective that they are all made in the same huge factory in
Taiwan. Style and image are paramount.

It was all once so
very much different. On joining a club as an impecunious teenager,
some of the older members would take you aside when you turned up on
your Hi-Ten 'gas pipe' tubed bike and offer the advice, “You need
to get a good pair of wheels son”. No criticism was offered of
your bike. The order of upgrade, to make your machine more user
friendly to cover miles, was wheels, saddle and gearing. It was
recognised that to have a custom made frame took money. Fitness was
as important as the bike. If you were lucky, someone would help you
out with bits for your bike. A promising rider may have been given
an old lightweight frame or given the opportunity to purchase a
secondhand lightweight bike.

A new frame was a
significant and important purchase. Firstly which framebuilder to
use? What wheel size, frame angles and fork rake? Do you want a
square frame?, i.e. seat tube and top tube the same length. Was it
to be a track bike, pure road race bike or would it have to be used
for touring/general riding as well, so mudguard clearance was
necessary. If you specified the old British 27”/630 wheel size
there was plenty of clearance for 700C race wheels. What about braze
ons? Campagnolo lever bosses, bottle cage bosses, cable guides on top
tube? What tubeset to use? Reynolds 531 plain gauge, 531 double
butted, 531 Superlight or that new Reynolds 753? More exotic
tubesets were available from Ron Kitching, listed in 'Everything
Cycling', Columbus or Ishiwata. What colour and finish do you want,
flat enamel, metallic or pearl? Any chrome plating to frame? This
will slow the delivery. You could reasonably expect to wait for 4 to
6 months for your custom frame. Thought would have to be given to
choice of headset. The obvious preference would be for continental
kit, Campagnolo or Stronglight. Reality was you couldn't often
afford it, so more likely the British made TDC or the Japanese
Tange-Seiki was used instead.


The debate amongst
cyclists was which was the better frame builder, especially where
hand cut lugs were concerned, and what was the best frame geometry
for the ideal bike? Was it better to have the head and seat tube
angles parallel? 72 or 73 degrees or have the head angle steeper than
the seat tube angle – 74/73 for track, 73/72 for road. Some argued
this made the bike more comfortable but responsive when compared to a
parallel frame. Others advocated that the seat tube angle was
steeper than the head tube, so 73/74, 72/73.


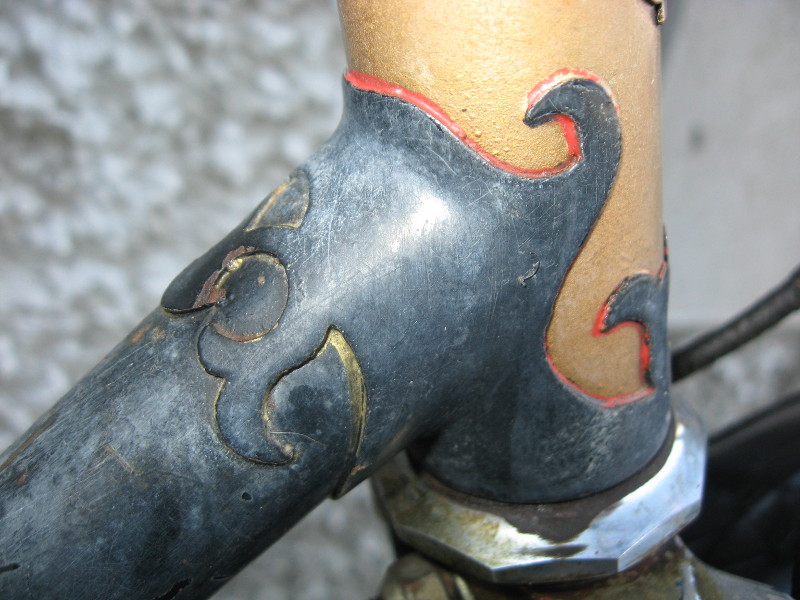

The steeper head
angle also brought the front wheel back towards the bottom bracket,
so toe overlap could be a problem. Fork rake could also be a factor
here as well. Fork rake for road bikes was generally in the range 1
3/4” (1.75”) to 2 1/2” (2.5”). The fork rake for touring
bikes was in the 2- 2.5” range. Forks with less than 1.75” rake
were generally fitted to track bikes, the shorter fork rake being
more useful on a banked track and a more generous fork rake for grass
track racing. A further consideration was the shape of your fork
blades, round (preferred for track frames), D to round, or oval. Some
riders wanted round forks for their road bikes in the early 1950s as
they believed the forks were stronger. Then there was the fork
crown, double plate, square shouldered or semi sloping Italian?


How were the seat
stays to be fitted to the seat lug? Were the seat stays to be
attached to the side of seat lug and finished off with a seat stay
caps of various kinds, or go for wrapover seat lugs which some
alleged were much stronger? Another important factor in the ride of
a bike is the wheelbase. Some advocated keeping the chainstays as
short as possible to reduce 'frame whip' and to improve the power
transmission. The pre WW2 Baines Brothers V37 'Flying Gate', the
Saxon Twin Tube and Sun Manx TT were all examples of this. The
significant thing is that up until the Second World War, most racing
was time trials and frame design reflected this. The fact that
riders were not allowed to show any kind of advertising meant that
some frame builders created unique designs which were readily
identifiable in a photograph via the cycling press of the day without
the need to see any decals. The harsh draconian 'amateur' status was
rigidly policed and enforced by the sports officials of the day.
Other attempts to increase the rigidity of steel frames and reduce
frame whip from before WW2 was the Bates Brothers 'Cantiflex' tubing
and 'Diadrant' forks and Bill Ewing's & Percy Dean's (Granby) 1925 patented 'Taper Tube' method of construction. Maurice Selbach
and Claud Butler also built frames using this tubing. The Granby
Taperlight tubing had the seat tube and down tube increasing in size
towards the bottom bracket to increase frame stiffness. The
chainstays changed from round section just aft of the bottom bracket
to square section before reverting back to round section towards the
dropouts. Granby also patented a design of bottom bracket and rear
dropout. A similar concept of frame using pressed steel for utility
roadster bicycles was produced by New Hudson of Birmingham in 1936 as
their 'Empire Roadster' model. The Bates design had always been a
topic of discussion with many dismissing the tubing and concept as a
gimmick. A frame was tested in the early 1990s by the UK National
Physics Laboratory which confirmed the Cantiflex tubing and frame was
stiffer than conventional Reynolds 531.


So a shorter
wheelbase was advocated for a livelier ride. Track bikes tended to
have a shorter wheelbase than road bikes because of the shorter fork
rake, steeper frame angles and rear facing rear dropouts. Latterly
track bikes were used solely on the track, so mudguards were not
needed. The influence here was track riding was less popular and
increasing affluence meant people could afford more than one bike, so
pure race and track machines were developed really from the late
1960s/1970s, a change from what had gone before when one bike had to
do everything. I had a road race frame built which had 74 degree
parallel angles with a short fork rake for racing on short road circuits
(kermesses) and time trialling. The bike certainly felt much
livelier than my other road race bike, but the trade off was comfort.
It transmitted a lot more road vibration and riding it in the Irish
50 mile TT championship event on the Navan Road proved to be an
uncomfortable and unforgettable experience. One which I never
repeated. It was one of the reasons that professional racing
cyclists had a variety of bikes, some with different angles and
gearing setups for the various stages they rode. As an amateur you
rode what you could afford.

Once you received
your frame then the next job was to build it up. The preferred
choice of equipment by the 1970s was Campagnolo, but again it was
available in 3 different price ranges, Gran Sport, Nuovo Record and
Super Record. The French did not produce 'a gruppo' like Campagnolo,
but did make some really good kit. Maxicar hubs and the TA 5 bolt
Cyclotourist chainsets were expensive but very good. French
derailleurs were not popular except on budget sports bikes, but Maeda
Suntour were much cheaper than Campagnolo and very good. The Suntour
Superbe professional quality parts have now attained nearly legendary
status. The recourse for the financially challenged club cyclist was
Ron Kitching's 'Milremo' range of parts, mostly of French or Italian
manufacture but cheaper than their branded relations. Most club
cyclists bought what they could afford and would upgrade parts on
their prize machine, with the removed parts cascading down onto your
hack bike or part exchanged for some other bit of kit you wanted from
a clubmate. Once you had your bike in the trim you desired then any
changes to be made were considered. If it wasn't broken then it didn't
need fixing. It was acknowledged that the tubular tyre fitted to your
racing sprints could have a big impact. Ron Kitching's 'Lion' brand
GT30 or slightly better GT28 were the staple fare for many. Getting
a really good pair of wheels, Campagnolo Nuovo Record Hubs laced into
Mavic GP4 sprint rims built by Pete Matthews and shod with Clement
'Criterium' tubular tyres was the best pair of race wheels I ever
owned and with which I did some of my best racing performances.


I knew exactly what
kit I wanted on my bike and built it up myself. If it didn't work
then you only had yourself to blame, but equally I wouldn't let
anyone else tinker with my bike. Your hand made, made to measure
frame was an investment which could be repaired if you crashed and
damaged it. It was built to last and do what it was built to do.
That is not say that frames didn't break because of poor workmanship,
stress risers created in the manufacture causing frame failure, or
too much heat used when brazing causing similar tube failures. Not
having the frame 'bonderized' or treated with Jenolite before
painting, poor paint finishing and neglect by the owner of the paint
damage could lead to a frame breaking through corrosion. But steel
would often give some warning of it's impending failure unlike
aluminium, which would fail without much warning. It was also readily
repairable at a garage, where gas brazing was available. The running
repair would enable you finish your ride and get home, before getting
the frame permanently repaired.


Self employed
framebuilders putting their own name on the frame tended to be
better. Your best advert was your work. If you built too many
lemons you went out of business. Some of the bigger operations
struggled with quality of workmanship from time to time. (I have seen
a new frame which was out of track). It is why you can have two
frames from the same source with apparently similar or identical
geometry which ride completely differently. One's a peach and the
other a lemon. Framebuilders bikes I remember seeing at that time
were, Bates, Hetchins, Maclean, Viking, Harry Quinn, Ron Kitching,
Witcomb, Holdsworth, Claud Butler, Charles Roberts, Stan Pike, Ken
Bird, Harry Hall, Hill Special, Carlton, Wes Mason, Bob Jackson,
Mercian, Woodrup, Wester Ross, Flying Scot, Jack Hearne. Local
Northern Ireland framebuilders I remember being raced, was
Tommy Donaldson – Lurgan, County Armagh and Gordon Brothers –
Hillsborough, County Down. The list is not prescriptive as there
were many others.


